
February is all about hearts and flowers (and foliage for some)!
Orchids seem to make more of an appearance on supermarket shelves as we approach St Valentine’s Day, so I have written a piece about them for this issue. We also have a variety of articles, some from new contributors. One in particular, by Patsy Cooke, follows a trend, that I hope we can continue, about parents’ and grandparents’ gardens.

Helena Kent. Club Secretary
Breaking News…..…Breaking News……..Breaking News…..…
Save the date! Weds, 24 February at 7.20pm.
Our very first MHGC Zoom meeting! Speaker: Robin Pearce has been booked to give talk on ‘Hostas and Companion Plants’.
Details: Join meeting at 7.20pm for 7.30pm talk. Approx one hour long.
I will forward you more details, the link, meeting ID and pass code nearer the time.
March meeting will also be by Zoom. Weds, 24 March at 7.20pm. Speaker will be Ian Thwaites on ‘The Life of a Plant and Garden Photographer’.
Due to the present uncertain situation, we will send you details of April and May meetings and future visits nearer the time.
Subscriptions 2021.
Subscriptions are now due for renewal for this year. We are maintaining the yearly subscription at £10. The cancellation of the Malvern shows has resulted in a substantial loss of income for the club, as we usually receive monies from holding the plant crêche. In order to remain sustainable as a club, we need to continue with the usual subscription fee this year. Please look in the newsletter for details of how to pay electronically – our preferred method.
If you wish to pay by cheque, please make payable to Malvern Hills Gardening Club and send to the club treasurer. Address is Mary Pillon, 12, Arosa Drive, Malvern, WR14 3JP.
Looking forward to March, we are going to feature allotments and vegetable growing.
Here is a taster from Barry Kent. .
Tales from the Allotment. January 2021
Two years ago, I took over an allotment at the Goodwood Road council site. I was surprised to be offered the plot, as there was a long waiting list. The previous tenant was obviously into fruit. The plot was overgrown but during 2019, I found healthy red and blackcurrant bushes, cultivated blackberries, an apple tree and two gooseberry bushes. For some reason, 2019 was a good year for currants and 2020 for apples and blackberries.
The plot could not be rotivated, as there were many ‘hidden’ paving slabs and wooden planks, which were possibly used as dividers? In the last three months I have pruned the fruit bushes and apple tree. New strawberry plants have gone in, replacing old plants. Young blueberry bushes have been planted and dwarf raspberry bushes will replace the old ones, which have expired!
The only vegetables I have left are leeks, which are okay, despite part of the plot having been recently flooded. As this winter weather is so variable, weeds are still appearing. Thinking back to the 1970s, in November, when my garden was dug over and manure added, weeds never seemed to be a problem!
If you wish to share your experiences (good or bad) of vegetable growing or allotment holding with fellow club members, please email malvernhillsgardeningclub@gmail.com by February 20 for inclusion in next newsletter. Thanks!
Helena Kent
A Dream of a Greenhouse by Patsy Cooke
I started gardening in the late 50’s as a small child, helping my widowed mother in our garden on the outskirts of London. We talked about gardens and gardening while we worked. I loved that garden.
The things I remember were mostly colour or form: lots of bulbs, day lilies, “grandma’s bonnets”, phlox (that unforgettable scent), masses of Lily of the Valley and forget-me-not, London Pride (of course), bears breeches, peonies, Michaelmas daisies, globe thistle (called by us Pippa Flowers as they were always in bloom for my sister’s birthday) and periwinkle under a very early flowering pink rhododendron.

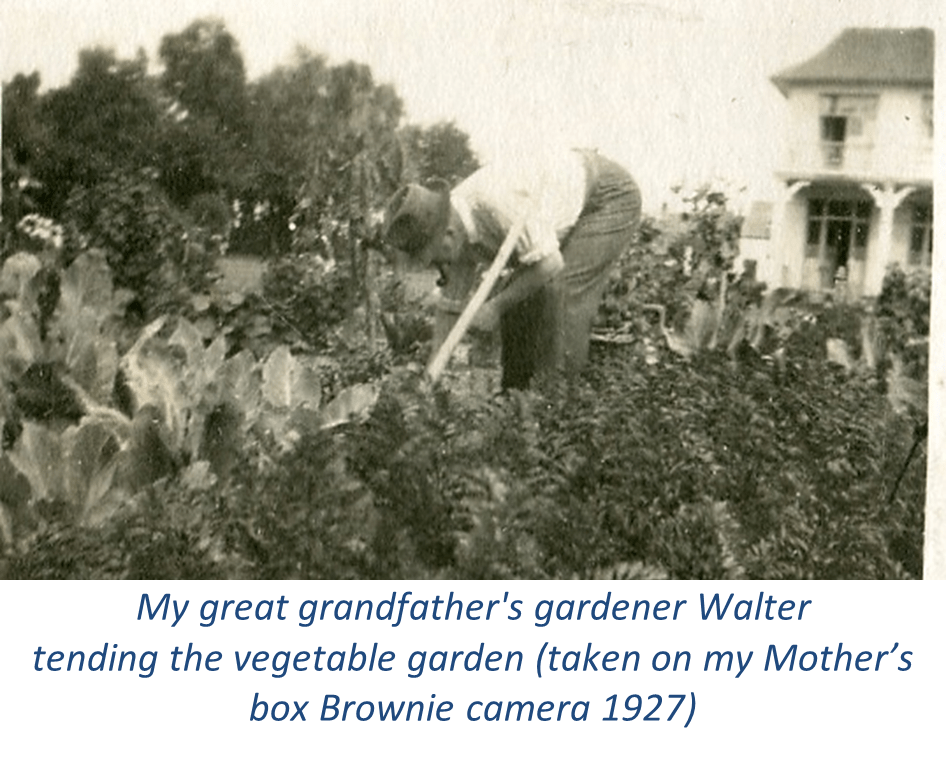
We had walnut and apple trees and lots of soft fruit. My father had planted roses: Albertine, Peace and Pauls Scarlet among them. I remember too primroses originally brought from the family home in Devon to form Mother’s wartime wedding bouquet – some of them pink. I have their offspring in my garden even now. Mother cultivated a veg patch – anything she could get hold of. She saved seed whenever she could.
On her own with five children, my mother couldn’t afford a greenhouse. She was a very pragmatic gardener and only grew what she knew would survive hordes of children, some neglect and next door’s enormous tortoise. “Loity” had a voracious appetite for our veg and regularly had to be rescued from the bonfire heap. Anything the least bit tender lived on the window ledge in the small conservatory and endured the attentions of a series of interested budgies.
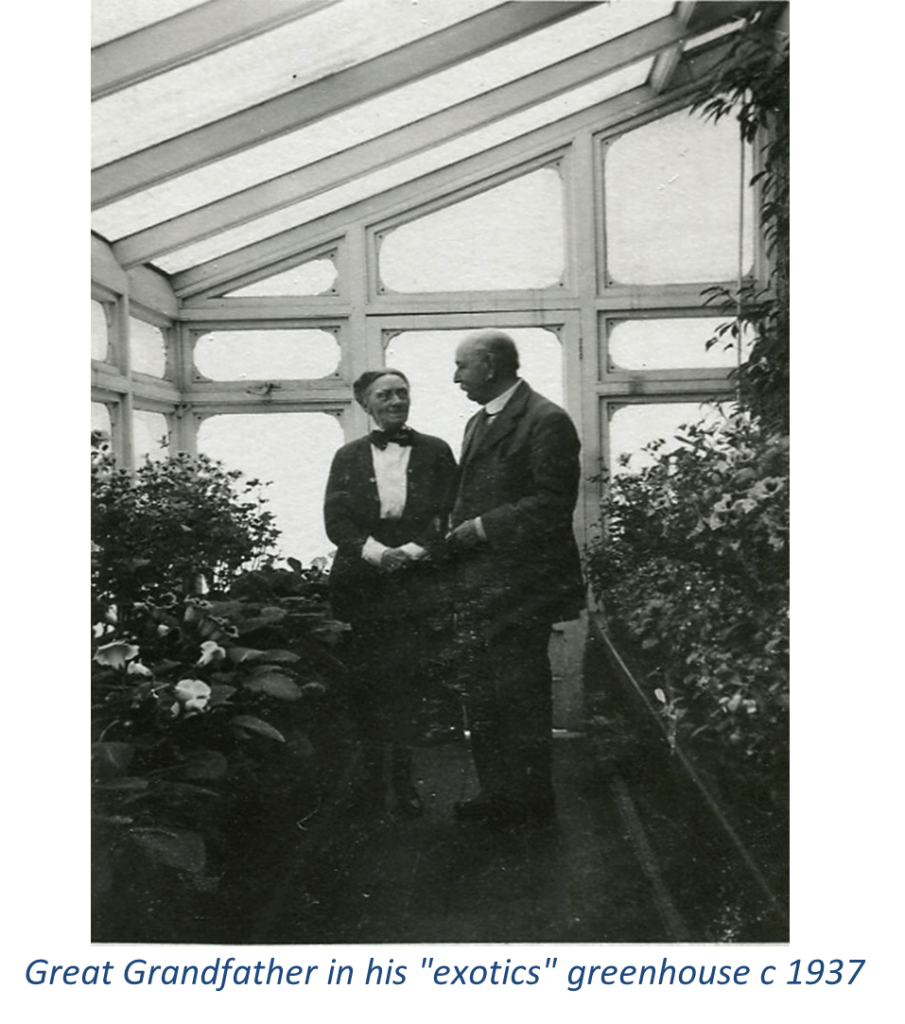
Apart from a vegetable garden, they had a rose garden, another garden planted with flowers for the house, espalier fruit underplanted with strawberries lining the footpath to the front door, extensive lawns and several greenhouses. How the other half lived! I could only dream about having my own garden and it had to have a greenhouse.

I did get a garden in 1980 and was able to share a 6’ x 4’ aluminium lean-to greenhouse with my then husband. Whilst it was a start, it wasn’t satisfactory for either of us as it was small when we each wanted different things from it. But we were able to be a bit more ambitious than before and certainly enjoyed our successes. It was definitely better than nothing, but it wasn’t the greenhouse I was dreaming about.
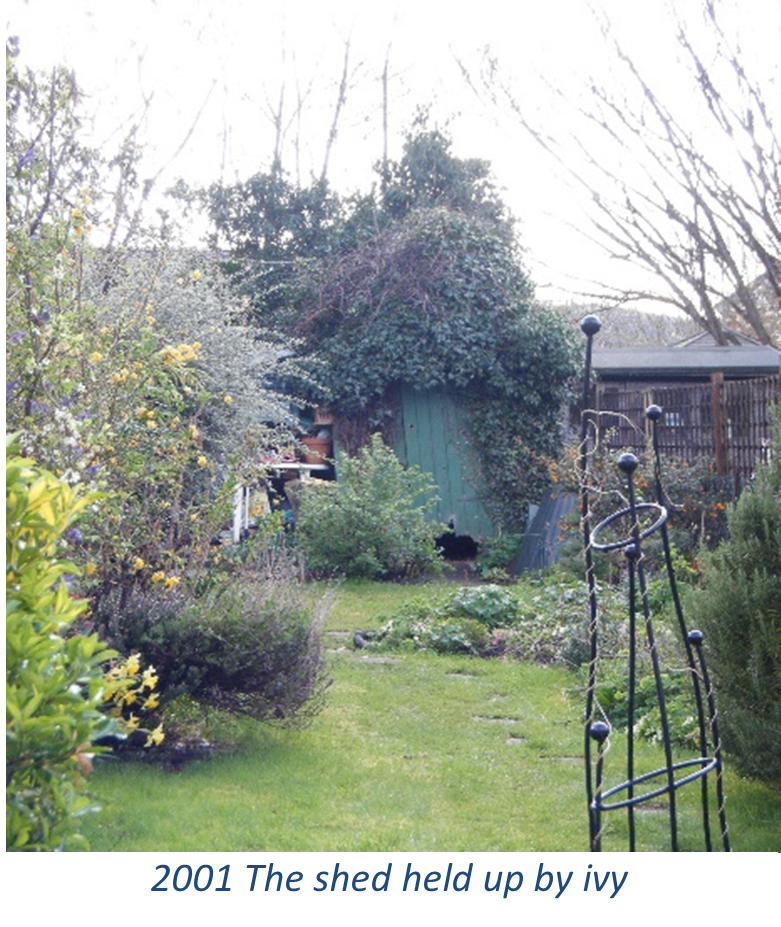
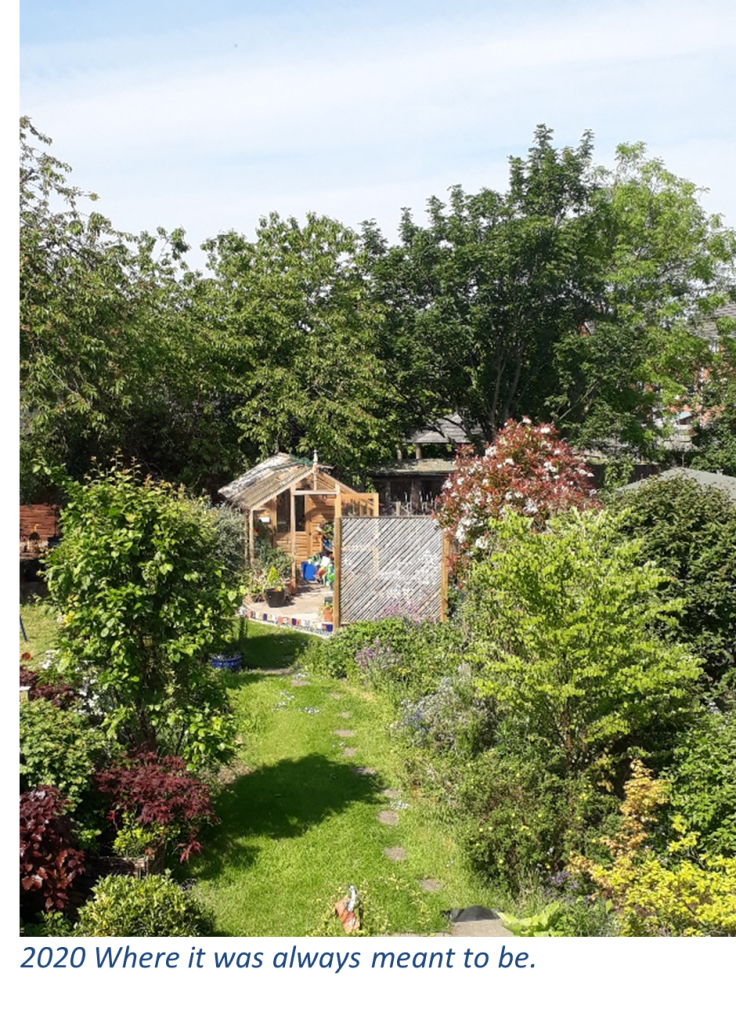
In 2000 I moved to Malvern. The garden was now my sole responsibility to do with as I chose. I began to plan. I had inherited ‘the shed held up by ivy’. It really would have fallen down if I tried to remove the ivy. All I dared to do was give it a serious hair cut each year but it was where my greenhouse would eventually go.
Funds were tight and I still had three children at home… so still no greenhouse. I spent hours in the garden, learning more about what would grow, plant names, planting times a bit about pruning and some of the endless other things that go with learning to be a gardener when you’re just doing it. I tried a plastic covered mini-greenhouse anchored to the wall to keep a few plants in and was frustrated by its limitations. I learned the gardener’s lesson – patience.
All this time I was looking at sheds and greenhouses and every possible combination thereof. So much so that my daughter christened it “shed porn”.
My dream greenhouse had to be exactly what I wanted. For practicality it had to be part shed, to effectively store all my garden and household tools, as well as a reasonably sized greenhouse. Later I decided that I needed automatic vents and power for heating and lighting, for dark winter days and long evenings and the essential radio. I wanted room for a seat and a small table for the very important cuppa or glass of vino colapso. The greenhouse itself had to be made of cedar, for its beauty, long life and low maintenance qualities.
By 2017, children gone, I knew that I’d saved enough that I could afford something special at the Spring Show. With a view to having time to prepare the base, I enlisted my sons’ help to demolish the old shed. I couldn’t wait for my Sheddy-greenhouse to arrive but was also anxious as it is still the most expensive present I’ve ever bought myself.
I knew that I wanted to be able to maintain the shed myself and stop the ivy from returning, so there had to be a walkway all round, with space at the back for at least one water butt and a storage box.
Like most Malvern gardens mine is not at all level, so with the help of a local contractor, who was able to rid me of the final obstacles by pulling an old tree stump and an 8-foot length of sleeper out of the ground. Who buries a sleeper? By the end of July, he had levelled and then paved the area, ensuring that there was a suitable gravel filled run-off for water around the outside of the greenhouse. I was then able to use the warm dry days of August to edge the step with some leftover Moroccan tiles.
On 13th October 2017 it was delivered and erected by the suppliers.

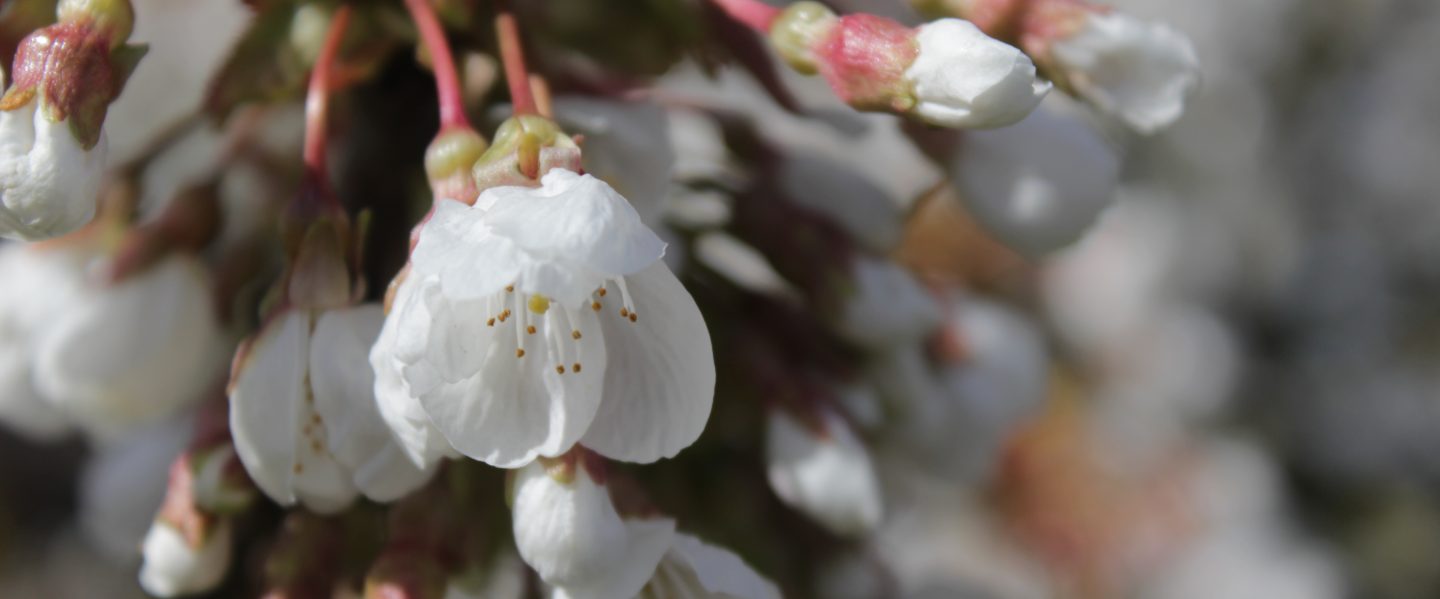
I can honestly say that apart from being a really practical answer to my storage demands, it answers all my other needs. My neighbours love that the shed is at the back and does not take any light from their veg plot and I love that when the light from the shed window isn’t enough, I can flick a switch and find everything within arms reach. The front gets all the light it needs for plants to grow strongly and in summer gets some shade from next door’s cherry tree. It’s all accessible and easy to keep clean. For fun I’ve titivated it with fairy lights and with a lizard on the finial. My grandchildren love it and so do I.
Just over three years on, I still feel that it has been my best present and investment. Hours fly by when I’m pottering in there. I have grown more, sown more and propagated more and differently every year. Even though it’s not as tidy as it was in last February, it has been a place of refuge and sanity during the madness of the last year.
Even on days where I’ve not felt like gardening, when it has been icy outside or during a downpour, I’ve found myself in there listening to the rain and wind, to the radio or just to nothing at all. I remind myself that this is a dream that has come true. As Winnie the Pooh would have it “Sometimes I sits and thinks. And sometimes I just sits.”
My Love Affair with Orchids
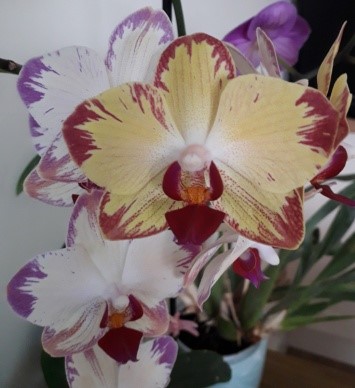
My love affair with orchids began in Florida, several years ago. It is a wonderful place to grow orchids and any sub tropical or tropical plant. A wide variety of orchids are readily available to buy in garden centres, specialist orchid nurseries, at fairs and shows. Every town seems to have an orchid society and best of all the raffle prizes are orchids! This photo shows a Dendrobium phalaenopsis hybrid, which I won in a raffle!
In Florida orchids are happy to grow outside, as long as they have the required amount of shade. They love the humidity and heat and can survive some cold, if temperatures drop during a cold front. You can attach the epiphytic types, such as Phalaenopsis to trees or bark and as their roots develop, they will cling happily to the tree, following their natural habit, as they would grow in the wild.
Of course, Florida is a long way from the UK and conditions could not be more different but the good thing is, you can replicate most of the conditions they need in your own home. Orchids are fairly tough plants and will tolerate a lot of abuse! If you consider how they grow in the wild you get a better understanding of their needs.
Phalaenopsis (Moth Orchids) are the most popular type here and most supermarkets sell them. They are considered as ‘throwaway’ plants but there is nothing more rewarding than getting them to flower again. It may take a year but well worth trying! When they do bloom, the flowers can last for 3 months or more. In the photo, this Phal rebloomed after a year, (if I remember right!) and lasted for so long, that when the final flower opened the rest had faded!
There are many books and magazine articles which give advice on growing orchids. One book I would recommend is ‘Growing Windowsill Orchids’ by Philip Seaton. (Kewgrowing). A few simple tips I would give for growing Phals are: keep them out of direct sunlight, away from draughts and radiators and do not overwater! Water them once (or twice) a week in summer and less in winter. When you can see their roots are very green, they should not need watering but when the roots turn a silvery white, then they can be watered. The mantra I followed in Florida was feed ‘weekly, weakly’ and here too but not in winter. You can mist them regularly too or grow in bathrooms or kitchens, where they like the humidity.
If you want to try something other than Phals, you can sometimes find Oncidium (dancing ladies) in local grocery stores, supermarkets or nurseries. Otherwise you need to visit a show, such as the Three Counties in June, which hosts an International Orchid Show or Gardeners World Live at the NEC, Birmingham in June, which have orchid growers or buy online from an orchid specialist, such as Burnham Nurseries in Devon, www.orchids.uk.com.
The same general rules of care apply to Oncidium but water regularly or leaves will concertina. Do not allow to dry out completely between waterings.
When you buy from a specialist, you will get the species name and although they are usually more expensive, they tend to be better quality and come with advice on growing. Orchids used to be very expensive and the preserve of the rich. Some even have been the motive for murder! However due to modern techniques of propagation, they are now on mass production and we don’t have to worry about anyone with orchid envy!
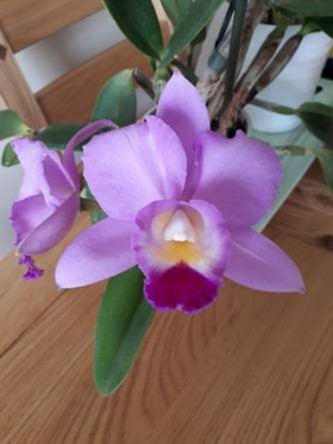
In my opinion, Oncidium (as in these photos) are hard to beat when it comes to variety of colour and some species even have scent. However, when it comes to fragrance, my favourites have to be species of Cattleya.
The genus Cattleya was named after an English merchant and horticulturalist, William Cattley. Cattleya spp have the most divine perfume and the blooms used to be chosen as corsages. I bought one plant a couple of years ago and it kept producing more leaves, so that I divided it to make two plants, which have survived my repotting. They don’t show any signs of flowering yet and I may have to be a bit patient! Anyway I live in hope! Here’s a photo of original plant. Unfortunately a picture doesn’t reproduce the fragrance!


I hope that I may hear from some other orchid enthusiasts. The nearest orchid society I know about is Cheltenham and District Orchid Society but if there is anything nearer I would be pleased to hear about it.
Helena Kent
Clivias
In many ways these make ideal house plants. They do not require constant attention and spend the summer in a shady place outside. In the winter they prefer a cool room indoors, in our case a conservatory. Clivias cannot take sun. Sun will burn the leaves. The flowers are showy and long lasting, mostly orange or yellow. The main flowering season is spring and summer but ours can flower at any time of year. The picture was taken on January 18th. When they flower in the summer we bring them into the house so we can appreciate them.
The plant in the picture is our original purchase, several years old now. In the meantime it has been split several times and offshoots passed on to friends. Being pleased with the original, unnamed, plant we have added to the collection, plants mostly with cultivar names, some bought online from a grower and a couple from Bob Brown’s Cotswold Garden Flowers. We bought a magnificent plant from him with very large pale yellow flowers. Keen to try different colours we bought a variety called Pink something or other. It turned out to be orange. We took it back. They were fine about replacing it with another Pink something or other. It too turned out orange. We could not be bothered going back a second time. The nearest we have to pink is a shade I call peach. We are still looking for red.
The seeds need time to ripen and then germinate readily, just place them on the surface of the compost, do not bury them. They are slow growing. Our first seedlings may flower this year. Until recently there has been little trouble with pests but over the last 12 months several different houseplants have been attacked by mealy bugs. Oil based insecticides have little effect. I am going to try Bug Clear Ultra.
Richard Winterton 20th January

Houseplants by MaggieJo
There’s a radio programme I occasionally catch ,when someone is given the opportunity to thank someone, that at the time, they didn’t have the chance to. This is my thank you to a Bizzie Lizzie.
Bizzie Lizzie. As I recall from the early and mid 1970s, she was an indoor plant; mind you I didn’t have a garden, so maybe hardy versions of her were out there then? A Bizzie Lizzie first lived with me in a first floor flat in Putney until I went abroad to work for nearly three years, leaving her in the care of my green fingered Mum. While I was away, I was stunned, on a trip in the hills of Argentina, to meet her family, growing in profusion as huge swathes in the moist shade along the edges of roads. My own Bizzie Lizzie had also flourished and came back, a foot in diameter, glossy leaved and colourful, to live in another first floor flat, this time alongside Wandsworth Common and whenever I see her now, I am mentally transported back there because she became a saviour. An unhappy love affair had left me there, moping alone in November, impelled out of bed only by the need to go to work; my evenings were spent miserably curled up by a radiator, unable to motivate myself. Until one evening, I glanced over and horror of horrors my gorgeous large Bizzie Lizzie was looking just like me: her leaves were drab and wilted; her flowers had dropped; her buds were drooping; her soil was dry and bereft of life. I moved faster than I had for several weeks and I gave her water. Slowly over the next few weeks she and I picked ourselves up; her leaves spread out and so did my footsteps; I picked off her dead stems and put them, with my romance, in the bin; her leaves began to shine and I took care over how I looked; she put out new blooms; I smiled and thanked her for returning me to sanity!
Splitting/Sharing Ornamental Grasses
Those who collected tomato plants from me last year will know I have a small front garden, sloping down with a good view onto the Beacon. Lovely. It is the sunniest place I have; it is also wind blown and dry. A talk at Colwall garden club on ornamental grasses set me thinking, some might thrive there better than the lawn grass, which turns brown each year. I’ve read that late winter/early spring is the time to split them, so 2021 is my yearof action. Please do any of you have ornamental grasses that will benefit from splitting and you’d be willing to share?
Thank you, MaggieJo
Tel 01684 574999
7 Tudor Close, Poolbrook, WR14 3SA
Propagation notes February 2021 by Rachel Salisbury
House Plant Propagation
Helena has asked me to focus this month’s notes on house plants. Anyone who knows me will be aware that my relationship with houseplants is not great, although I do have intermittent spells of ‘I will try harder’! Most of my experience of house plant propagation dates back to when I was a student, when my desk looked more like a greenhouse bench than a serious workplace for a student. What that did teach me was that ‘trial and error’ is a good way of learning.
That said let’s have a look at a few appropriate methods.
Seed. Houseplants which produce flower can be propagated from seed. Most can be sown at any time of year and germination times vary enormously. They will need warmth: for most 20-25C is ideal and should be as constant as possible. A windowsill that gets cold at night is less likely to produce good results. If you have a heated propagator, this is a good time to use it. If you choose to put your seeds in the airing cupboard, make sure to check them daily. Once germinated, they need to be removed into a light place and not exposed to a sudden temperature drop.
Sow seeds in a moist loam based seed compost. For very small seeds just mist spray lightly to settle them into the surface. Don’t cover with compost. Place pots in a propagator with a lid, or seal in a plastic bag. Check daily for germination and prick out/ pot up when large enough to handle.
Stem Cuttings Plants which have obvious stems and branches (like a small tree) can often be propagated from cuttings. These can be taken at any time of year, but Spring and Summer are best. Make the cutting as described for semi ripe cuttings earlier. Insert into moist, gritty, low nutrient compost. Place in propagator or seal in plastic bag and keep in a warm place out of direct sunlight. Do not place in airing cupboard ` cuttings need light! Most will root in 3-4 weeks. (Pelargoniums, Fuchsias, Christmas cactus)
Division Plants that expand sideways and gradually fill their pot, can be divided. This can be done at almost any time, but I would recommend Feb to Sept. Divided sections can be potted up immediately into a good potting compost and should establish quickly in their new pots. (Peace Lily , ferns, Clivia)
Air layering Used for a few woody house plants such as rubber plant. I’ll describe this in a later article when I cover it for outdoor plants too.
Leaf cuttings these come into their own with certain groups of houseplants. If you grow African Violets, Streptocarpus, Peperomia, Sanseveria or Begonia rex, this is the method you need to know about. African Violets and Peperomia are propagated from the whole leaves, whereas the others can be cut into sections to produce even more baby plants. In my impoverished student days I successfully propagated African Violets, Streptocarpus and Peperomia in jars of water, but I wouldn’t say this is my recommended method!
African Violets and Peperomias Take the whole leaf with the leaf stem. Insert into gritty low nutrient compost so that the base of the leaf blade is just at the surface of the compost. Keep moist (not too wet!) and warm. My mother had underfloor heating and used to have tray of African Violet leaves on the floor in the hallway! Basal heat certainly seems to help if you can provide it. After a few weeks, small plant will appear at the base of the leaf where it meets the compost. Allow to grow in for a few weeks then pot up.
Sanseveria, Streptocarpus and Begonia rex can be propagated from sections of the leaf, although whole leaves do also work. There are a number of similar methods, but for the sake of simplicity I’ll just describe one, known as butterfly cuttings. Take the leaf and with a very sharp knife make a cut diagonally from the edge to the midrib. Repeat from the other side so that the cuts meet in the middle. Repeat this process along the length of the leaf, at approximately 2.5cm intervals. You will then finish up with several V (or butterfly!) shaped cuttings. Insert the cuttings with the point of the V into the compost and treat as above. New plants will form at the point, and may also form where other cut veins are in contact with the compost.
Streptocarpus and Begonia rex These can also be propagated from whole leaves laid on the surface of the compost. Lay the leaf flat on the compost. Make cuts through some of the veins and pin down to make sure there is contact with the compost. New plants will form at the cut ends of the veins. Don’t get over enthusiastic with this at least until you become expert. A few cuts will probably give you all the new plants you need.
A few general points re: leaf cuttings.
- Use a sharp knife to ensure clean cuts
- Give basal heat if possible
- Keep in the light but out of direct sunlight
- Never use rooting hormone. More about this later, but for now suffice to say that rooting hormone inhibits shoot growth and is totally inappropriate for leaf cuttings.
Foliage
George Rees – 13th January 2021
I could live in a garden without flowers. Now there is a statement to start an article. But it is true and before I got into gardening it was the foliage of plants like ferns that drew me, rather than say roses. When I go to visit a garden (ah we all remember this right, ambling along losing oneself in the fauna and flora) it was always the kaleidoscope of greens that would catch my eye. Depending on the season it’s the layers from the trees, down through the shrubs, to the tall grasses, down to the perennials, evergreen ferns, and foliage like hostas, and down again to the ground cover of grass, moss or plethora of saxifrage say. The different forms, textures just a delight to my senses.
Here is a vista from John’s garden at Ashwood Nurseries that encapsulates everything I mean.
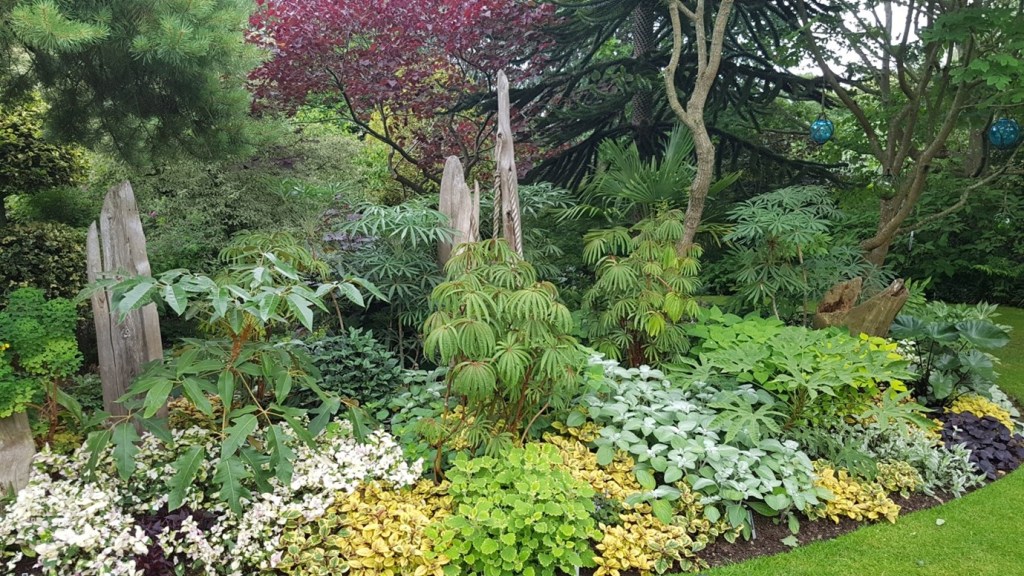
I attach this photo as I am actually in the exciting position of having just moved into a new garden in November (there was a house attached you will be pleased to know) so I am still in that stage of impatiently waiting to see what comes up in Spring before making my mark on it and creating my vision of what a garden could be.
This is where the article was born as I have quite a lot of plants in varying ornamental pots and planters waiting for their forever home in the ground and this winter has really shown just how much foliage especially evergreen I have. I could talk about ferns, hostas, heucheras, or grasses but I would imagine most of you have heard of these so instead I wanted to maybe introduce you to three of my favourite plants that will feature in the new garden and my thoughts on how and why.
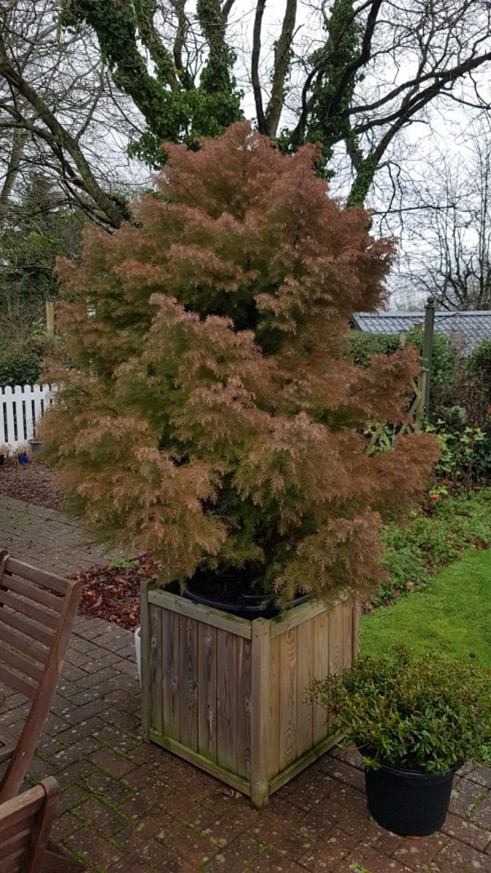
Cryptomeria Japonica Elegans
When I found my love for gardening and started reading and researching I was astounded at the bad press conifers seemed to get. Luckily not everyone thinks that way and I could indulge myself with some amazing varieties of all shapes and sizes.
This here is the Japanese Red Cedar. It is evergreen, but not only that actually gives you three different colours with blue/green juvenile foliage turning to verdant green in the summer then an amazing mahogany plum in the winter with the added bonus of not dropping but staying all winter long. It really is stunning. Now yes this depending on garden size might be too big for some with a mature size of 6 to 10 metres but there is also a compact form (Cryptomeria Japonica Compacta) which is only 1.5 to 2.5 metres tall at maturity.
There is a huge array of dwarf conifers out there and if of interest Ashwood Nurseries and Limecross Nursey are two good places to start.
Thamnochortus Insignis
I love bamboos and tall grasses but both present issues not least in general bamboos are huge and run, while tall grasses although beautiful throughout winter have to be cut back to the ground early in the year leaving a big hole in the planting plan.
When idling away time I tend to virtually wander from plant nursery to plant nursery online looking at different forms of plants that lead me to country specific plants and nurseries in this case South Africa. But as we know we live in the UK with unique climate and hardiness can be a problem so I always check this first before I get too excited about a new finding.
Thamnochortus Insignis is a type of Restio from South Africa that produces graceful arching culms eventually reaching 2 metres tall with a similar spread. For as well as being a striking plant it has the extra benefits of being clump forming, evergreen with a lovely seed head, and hardy down to -10°C.
I will use it interspersed with other tall grasses like miscanthus and calamagrostis so as they are cut back, the thamnochortus will still give me the presence I desire.

Dianella
Sword shape foliage. I think of phormiums (which become huge as David and Elaine will testify to) and crocosmias and irises (which die back in winter). I missed this foliage throughout the winter and that led me to Dianella or the tasman flax lily as it is also known.
Evergreen or deeply variegated “Destiny” it gives presence all year round with the added bonus in green form of stunning blue berries. Now I will say that this plant can run if left unchecked but it only involves digging up the runners and passing them on to gardening friends. They look lovely interplanted with the like of the irises of crocosmia where they will maintain that sword shape foliage throughout the year once the others have died back after flowering.
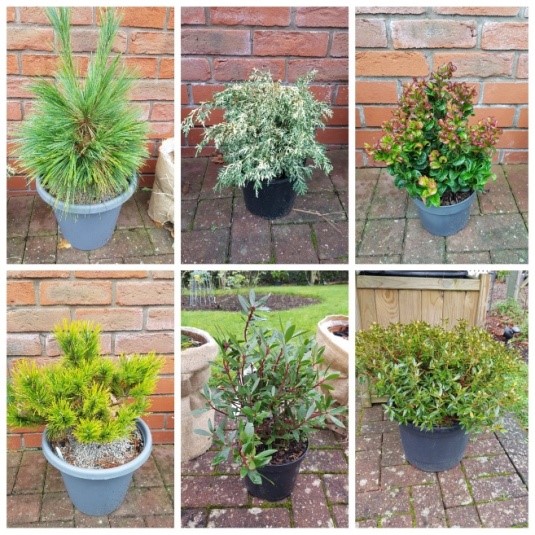
I hope this has given you some ideas or maybe a slightly different view of a garden and if you have managed to stay with me to the end then I applaud you as I know I can waffle.

I will leave you with some collages of foliage from my garden.


Peace on Earth biscuits from Hilary Thorogood
So called in our family because the recipe was written on the back of a Christmas card!
They are however very good and deserve the name. Also semi frozen.
Ingredients
- 4 oz of butter/margarine
- 4 oz caster sugar
- 1 dessert spoon golden syrup
- 6 oz SR flour
- ½ tsp bicarb of soda dissolved in 1tsp milk
- 3 oz sultanas/choc chips/chopped glacé cherries
Preheat oven to 180̊̊ C
Method
- Cream butter and sugar together
- Add syrup and bicarb of soda
- Add flour and rest of ingredients
- Divide mixture into small balls roughly walnut sized
- Place on greased tin leaving room around them for spreading as they cook
- Press lightly with a fork
- Cook at 180̊̊ C for 10-15 minutes. They should be just cooked
- Leave to cool and firm up on tray
